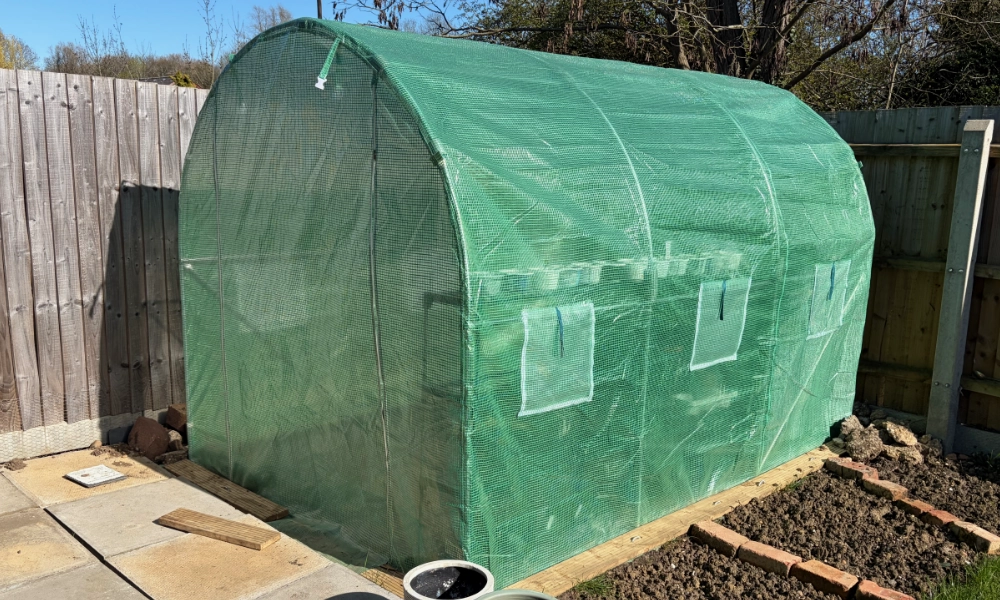
I built the Polytunnel on the 25th January 2026. I’ll update this post over time to record how it holds up!
I’ve never really done any gardening in the past but now I have gone all in and purchased a cheap polytunnel from Amazon. I plan to use it to grow tomato plants in and maybe start new seedlings.
The price was £59.99 which is very cheap but, it is after all, just a few metal poles and some thin plastic sheeting. I would have liked to have purchased a proper greenhouse but they are very expensive and I might go off the idea of gardening so for now a cheap polytunnel is the best option.
Building the polytunnel
The box it came in was surprisingly small and contained all the parts and there were no missing parts which was a good start. The instruction manual was totally useless and looked like it was created by a 4 year old child. The manual was swiftly binned and the puzzle started
To be fair it was very easy to work out what went where. Once the bottom base was created it was a case of making the end arch then repeating the same thing 4 times making the metal frame complete.
The cheap plastic green sheet that covers the frame is in one peace so all I had to do was chuck it over the top and the was essentially it. Total build time was about an hour on my own so that wasn’t too bad.
It’s very lightweight let’s pin it down
As you can imagine the whole polytunnel weights amount 6KG and is fairly big at 3 by 2 meters, perfect for catching the wind! Once I put the sheet over the top and pulled it down there a little extra plastic “about 6 inch” that is supposed to be buried into the ground securing the polytunnel down.
It doesn’t take a genius to realise that this wouldn’t do the job as when the wind blows it’ll pull the sheet up and we’d be watching the whole tunnel flying over our garden fence never to be seen again!
As burying the overhang wasn’t a viable option I came up with the idea of using lengths of wood “cheap decking boards” to hold it down. I laid the wood on top of the plastic the drove 16 inch rebar spikes into the ground. This seems like the best solution for now. “See photo below”

Inside the polytunnel
The polytunnel doesn’t come with any sort of base “as you’d expect for the price” it’s built over bare ground. I don’t want anything to be growing inside so I laid a few sheets of black plastic weed membrane. This was secured with a few random spikes to stop the membrane lifting as I walk on it.


Now, being new to polytunnels I didn’t realise that once I put it up I’d start having problems with condensation! as you can see from the photo below water has started collecting on the inside! I don’t suppose it’s a real problem I’ll just have to remember to open the door to let the air circulate a bit.

The polytunnel frame is made from metal tubing so I think that in the summer this is going to heat up a lot! This is going to be a real problem as the heat increases from the sun. The metal will be in contact with the plastic cover and it’s surely going to end up melting it.
To help reduce this I’ve found some plumbing pipe insolation foam and slid it between the plastic and the metal frame. I hope that this will help reduce the issue but i’m not feeling too confident.

That’s it for now I’ll update again in the future to see how well this cheap polytunnel holds up!